Alerts

The Alerts feature enables you to configure alert thresholds for the plugin to trigger alert messages to Allxon Portal. Then the Portal can send the alert message to you via email, Webhook, LINE, etc., depending on the notification channel setting on the Portal.
Similar to creating other cards, you need to send v2/notifyPluginUpdate to initialize the Alert Settings card. When Alert Setting is changed on Allxon Portal, the plugin would receives v2/notifyPluginAlarmUpdate. With such configuration, whenever the alert threshold is reached, the plugin triggers v2/notifyPluginAlert to the Portal.
Tutorials
Let's look at an example of creating Alerts:
First, send v2/notifyPluginUpdate to initialize the Alert Settings card.
{
  "jsonrpc": "2.0",
  "method": "v2/notifyPluginUpdate",
  "params": {
    "sdk": "2.0.2",
    "appGUID": "a8e873a1-e5df-43a2-928a-745ff9c94dfb",
    "appName": "plugin-hello",
    "epoch": "1664259325",
    "displayName": "plugIN Hello",
    "type": "ib",
    "version": "1.0.1",
    "modules": [
      {
        "moduleName": "plugin-hello",
        "displayName": "plugIN Hello",
        "properties": [],
        "alarms": [
          {
            "name": "hello_alarm",
            "displayCategory": "Message",
            "displayName": "Hello alarm",
            "description": "Trigger when someone say hello",
            "params": []
          }
        ]
      }
    ]
  }
}
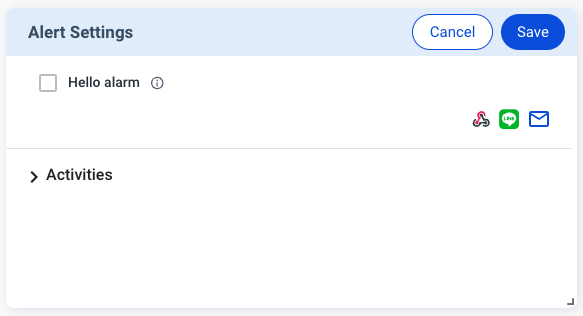
Upon completion, you can see the Alert Settings card, as shown below.

At this time, the Alert is not yet set up. The Portal sends the following v2/notifyPluginAlarmUpate to the plugin for resting alert configuration.
Going to deprecated format
{
  "jsonrpc": "2.0",
  "method": "v2/notifyPluginAlarmUpdate?authorization=$argon2id$v=19$m=64,t=16,p=8$Y1JmLkNDUjRkeFJ7UDBlOQ$qZPxG/iWuZTKQzbsvr86wg",
  "params": {
    "appGUID": "a8e873a1-e5df-43a2-928a-745ff9c94dfb",
    "epoch": "1664259814"
  }
}
Up coming format
{
  "jsonrpc": "2.0",
  "method": "v2/notifyPluginAlarmUpdate?authorization=$argon2id$v=19$m=64,t=16,p=8$Y1JmLkNDUjRkeFJ7UDBlOQ$qZPxG/iWuZTKQzbsvr86wg",
  "params": {
    "appGUID": "a8e873a1-e5df-43a2-928a-745ff9c94dfb",
    "epoch": "1664259814",
    "version": "1.0.1",
    "modules": [
      {
        "moduleName": "plugin-hello",
        "epoch": "1664259814",
        "alarms": []
      }
    ]
  }
}
Now you can set up the Alert Settings card on Allxon Portal. In this example, let’s try setting up an alert and connecting it to Webhook, so the alert message is sent via Webhook.
Follow the steps below:
- Click Edit on the upper right corner of the card.
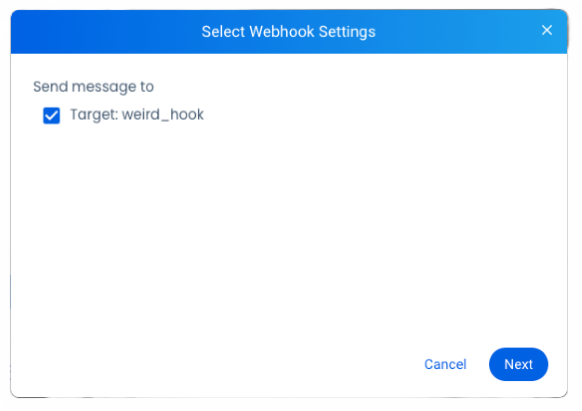
- Click the Webhook icon
- Choose a Webhook preset, and click Next.
- Click Save to complete the setting.
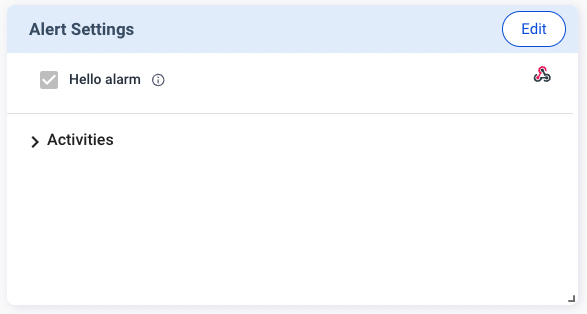
Once done, the plugin receives a new v2/notifyPluginAlarmUpdate as below to notify the plugin that the Alerts Settings has been updated.
{
  "jsonrpc": "2.0",
  "method": "v2/notifyPluginAlarmUpdate?authorization=$argon2id$v=19$m=64,t=16,p=8$J2chRypQWmxLLGl4O04zXg$KUvzIkRhS8Ao+FYTysdSWA",
  "params": {
    "appGUID": "a8e873a1-e5df-43a2-928a-745ff9c94dfb",
    "epoch": "1664268028",
    "version": "1.0.1",
    "modules": [
      {
        "moduleName": "plugin-hello",
        "epoch": "1664268022",
        "alarms": [
          {
            "enabled": true,
            "name": "hello_alarm"
          }
        ]
      }
    ]
  }
}
Accordingly, the plugin enables the designated alert.
To test the Alert, send a v2/notifyPluginAlert, as shown below.
{
  "jsonrpc": "2.0",
  "method": "v2/notifyPluginAlert",
  "params": {
    "appGUID": "a8e873a1-e5df-43a2-928a-745ff9c94dfb",
    "moduleName": "plugin-hello",
    "epoch": "1664268861",
    "alarms": [
      {
        "name": "hello_alarm",
        "action": "trigger",
        "time": "1664268861",
        "message": "Hello Buzz ~"
      }
    ]
  }
}
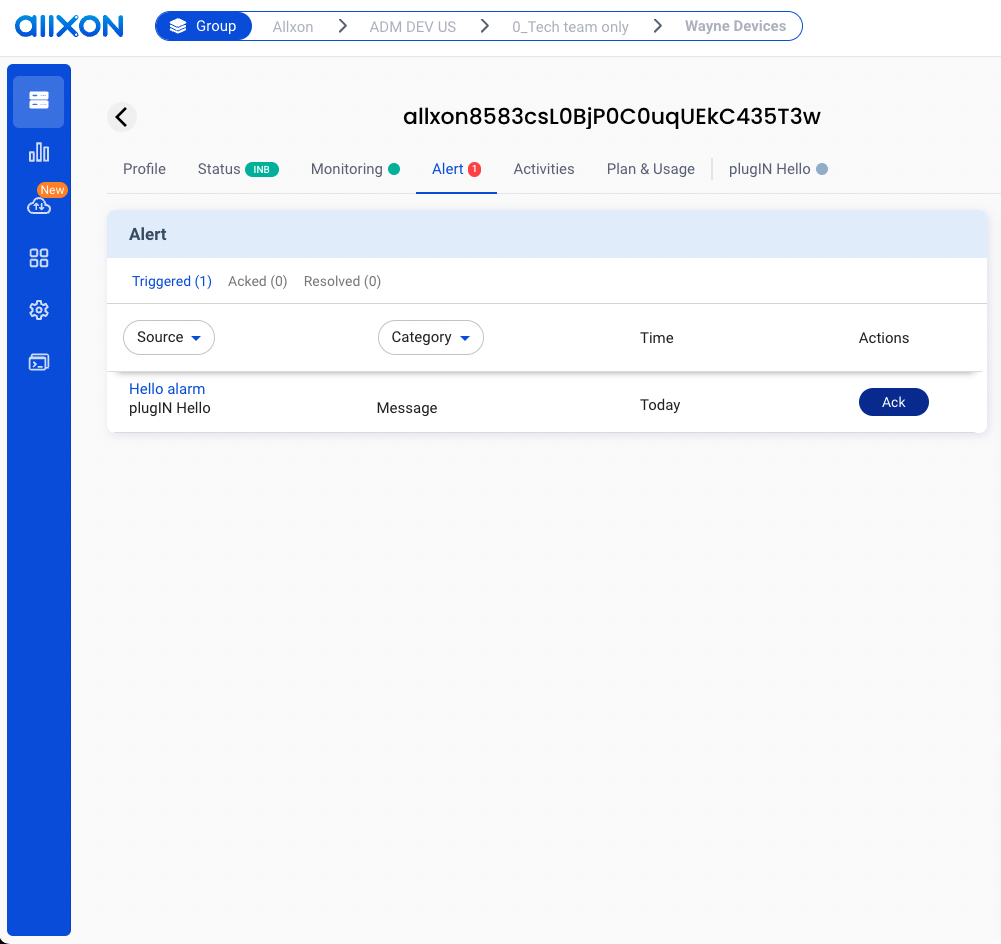
You should receive a message on your connected Webhook service. At the same time, Allxon Portal adds a new record to the Alert page of the device; all alert records are aggregated on this page.
The settings of Alerts and Configs belong to the group-level. When the user changes the Alerts/Configs settings on the Portal, the Portal deploys the changes to all the plugins in the same device group. Then Allxon Portal displays the Alerts/Configs card based on the latest plugin version in the device group and stores the latest settings.
When the plugin receives the Alerts/Configs settings, it MUST check whether the settings are supported by the current plugin version. If not supported, the plugin MUST ignore the message.
Display Type
The Alert Settings card supports several parameter input types (i.e. displayType): string, datetime, switch, checkbox, list, and temperature. For how to set up these input types, see the following sections.
String
The following example shows the code in v2/notifyPluginUpdate.json for displaying a text box for parameter input.
{
    ...
    "alarms": [
        {
            "name": "alarm1",
            "params": [
                {
                    "name": "stringParam",
                    "displayType": "string",
                    "required": false,
                    ...
                },
                ...
            ],
            ...
        }
    ],
}
The Alert Settings card displays as follows:
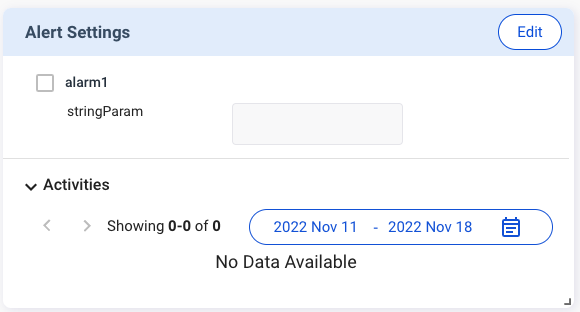
When an alert is enabled, v2/notifyPluginAlarmUpdate carries a "name" and a "value" from the parameter input.
{
    "jsonrpc": "2.0",
    "method": "v2/notifyPluginAlarmUpdate",
    ...
        ...
            ...
                "alarms": [
                    {
                        "name": "alarm1",
                        "params": [
                            {
                                "name": "stringParam",
                                "value": "foo"
                            }
                            ...
                        ]
                        ...
                    }
                    ...
                ]
}
Datetime
The following example shows the code in v2/notifyPluginUpdate.json for displaying a date/time picker for parameter input. You must define "displayFormat" by using one of the following formats:
"YYYY-MM-DD""HH:MM""YYYY-MM-DD HH:MM"
{
    ...
    "alarms": [
        {
            "name": "alarm1",
            "params": [
                {
                    "name": "datetimeParam",
                    "displayType": "datetime",
                    "displayFormat": "HH:MM",
                    "required": false,
                    ...
                },
                ...
            ],
            ...
        }
    ],
}
The time parameter to be sent is not a timestamp and does not contain any time zone information. The plugin executes the command of datetime parameter according to the device's time zone.
The Alert Settings card displays as follows:
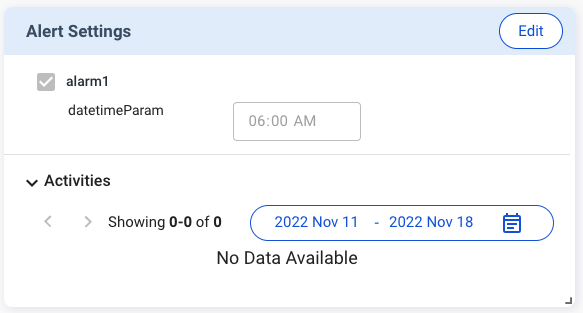
When an alarm is enabled, v2/notifyPluginAlarmUpdate carries a "name" and a "value" that follows the "displayFormat" defined in the v2/notifyPluginUpdate.
{
    "jsonrpc": "2.0",
    "method": "v2/notifyPluginAlarmUpdate",
    ...
        ...
            ...
                "alarms": [
                    {
                        "name": "alarm1",
                        "params": [
                            {
                                "name": "datetimeParam",
                                "value": "06:00"
                            }
                            ...
                        ]
                        ...
                    }
                    ...
                ]
}
Switch
The following example shows the code in v2/notifyPluginUpdate.json for displaying a switch toggle for parameter input. The switch toggle is used to switch between two parameters. You must define "displayValues" as a size 2 Array, with index 0 representing false and index 1 representing true.
{
    ...
    "alarms": [
        {
            "name": "alarm1",
            "params": [
                {
                    "name": "switchParam",
                    "displayType": "switch",
                    "displayValues": [
                        "offValue",
                        "onValue"
                    ],
                    "defaultValue": "offValue",
                    "required": false,
                    ...
                }
            ],
            ...
        }
    ],
}
The Alert Settings card displays as follows:
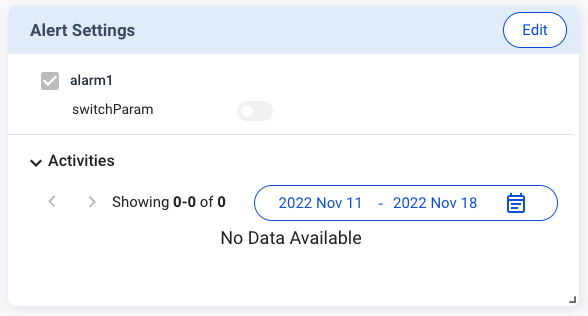
When an alert is enabled, v2/notifyPluginAlarmUpdate carries a "name" and a "value" that follows the "displayValues" defined in the v2/notifyPluginUpdate.
{
    "jsonrpc": "2.0",
    "method": "v2/notifyPluginAlarmUpdate",
    ...
        ...
            ...
                "alarms": [
                    {
                        "name": "alarm1",
                        "params": [
                            {
                                "name": "switchParam",
                                "value": "offValue"
                            }
                            ...
                        ]
                        ...
                    }
                    ...
                ]
}
Checkbox
The following example shows the code in v2/notifyPluginUpdate.json for displaying a checkbox for parameter input. The checkbox is used to enable or disable the parameter. You must define "displayValues" as a size 2 Array, with index 0 representing false and index 1 representing true.
{
    ...
    "alarms": [
        {
            "name": "alarm1",
            "params": [
                {
                    "name": "checkboxParam",
                    "displayType": "checkbox",
                    "displayValues": [
                        "offValue",
                        "onValue"
                    ],
                    "defaultValue": "offValue",
                    "required": false,
                    ...
                }
            ],
            ...
        }
    ],
}
The Alert Settings card displays as follows:
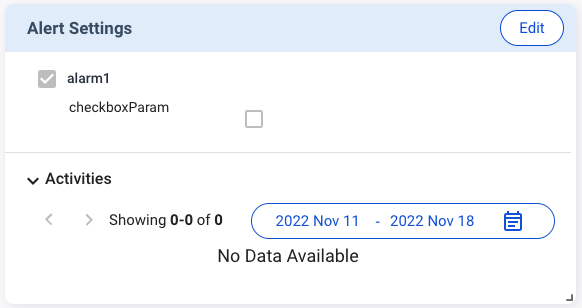
When an alert is enabled, v2/notifyPluginAlarmUpdate carries a "name" and a "value" that follows the "displayValues" defined in v2/notifyPluginUpdate.
{
    "jsonrpc": "2.0",
    "method": "v2/notifyPluginAlarmUpdate",
    ...
        ...
            ...
                "alarms": [
                    {
                        "name": "alarm1",
                        "params": [
                            {
                                "name": "checkboxParam",
                                "value": "offValue"
                            }
                            ...
                        ]
                        ...
                    }
                    ...
                ]
}
List
The following example shows the code in v2/notifyPluginUpdate.json for displaying a dropdown list for parameter input. You must define "displayValues" as the Array type.
The Alert Settings card displays as follows:
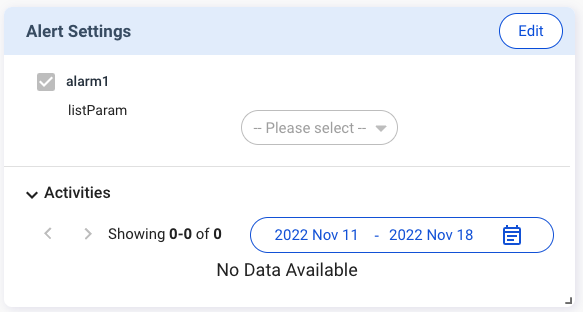
When an alert is enabled, v2/notifyPluginAlarmUpdate carries a "name" and a "value" that follows the "displayValues" defined in v2/notifyPluginUpdate.
{
    "jsonrpc": "2.0",
    "method": "v2/notifyPluginAlarmUpdate",
    ...
        ...
            ...
                "alarms": [
                    {
                        "name": "alarm1",
                        "params": [
                            {
                                "name": "listParam",
                                "value": "list1"
                            }
                            ...
                        ]
                        ...
                    }
                    ...
                ]
}
Temperature
The following example shows the code in v2/notifyPluginUpdate.json for displaying a predefined temperature scale for parameter input. Users can enter temperature parameters in Fahrenheit or Celsius.
{
    ...
    "alarms": [
        {
            "name": "alarm1",
            "params": [
                {
                    "name": "temperatureParam",
                    "displayType": "temperature",
                    "required": false,
                    ...
                }
            ],
            ...
        }
    ],
}
The Alert Settings card displays as follows:
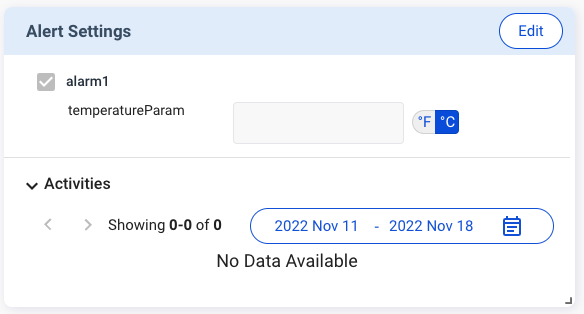
When an alarm is enabled, "v2/notifyPluginAlarmUpdate" carries a "name" and a "value" from the temperature parameter input.
{
    "jsonrpc": "2.0",
    "method": "v2/notifyPluginAlarmUpdate",
    ...
        ...
            ...
                "alarms": [
                    {
                        "name": "alarm1",
                        "params": [
                            {
                                "name": "temperatureParam",
                                "value": "301.15"
                            }
                            ...
                        ]
                        ...
                    }
                    ...
                ]
}
While the Fahrenheit and Celsius scales are used on the Portal, the temperature data sent to the plugin needs to be in Kelvin.